QScrollArea提供您方便為某個元件在畫面不足以顯示元件時,直接加上捲軸輔助顯示,而QScrollBar則可以讓您單獨建立水平或垂直捲軸功能,以自訂捲軸的控制行為。
例如以下的程式,將自行建立水平與垂直捲軸,以控制畫面中的QLabel位置:
- ScrollImage.h
#ifndef SCROLLIMAGE_H
#define SCROLLIMAGE_H

#include <QWidget>

class QLabel;

class ScrollImage : public QWidget {
    Q_OBJECT

public:
    ScrollImage(const QPixmap &, QWidget *parent = 0);

public slots:
    void setX(int);
    void setY(int);

private:
    QLabel *label;
};

#endifScrollImage為自訂元件,繼承自QWidget,並自訂了兩個Slot,以接受水平與垂直捲軸的數值Signal,其實作如下所示:
- ScrollImage.cpp
#include "ScrollImage.h"
#include <QScrollBar>
#include <QLabel>
#include <QPixmap>

ScrollImage::ScrollImage(
                const QPixmap &pixmap, QWidget *parent) : QWidget(parent) {
    this->resize(pixmap.width() * 10, pixmap.height() * 10);

    label = new QLabel(this);
    label->setPixmap(pixmap);
    label->setGeometry(20, 20, pixmap.width(), pixmap.height());

    // 水平捲軸
    QScrollBar *hScrollBar = new QScrollBar(Qt::Horizontal, this);
    hScrollBar->setGeometry(0, this->height() - 20, this->width(), 20);
    hScrollBar->setMaximum(this->width() - pixmap.width() - 20);

    connect(hScrollBar, SIGNAL(valueChanged(int)),
            this, SLOT(setX(int)));

    // 垂直捲軸
    QScrollBar *vScrollBar = new QScrollBar(Qt::Vertical, this);
    vScrollBar->setGeometry(this->width() - 20, 0, 20, this->height());
    vScrollBar->setMaximum(this->height() - pixmap.height() - 30);

    connect(vScrollBar, SIGNAL(valueChanged(int)),
            this, SLOT(setY(int)));
}

void ScrollImage::setX(int x) {
    label->setGeometry(20 + x, label->y(), label->width(), label->height());
}

void ScrollImage::setY(int y) {
    label->setGeometry(label->x(), 20 + y, label->width(), label->height());
}
來撰寫一個主程式進行程式執行與測試:
- main.cpp
#include "ScrollImage.h"
#include <QApplication>
#include <QPixmap>
int main(int argc, char *argv[]) {
QApplication app(argc, argv);
ScrollImage *scrollImage =
new ScrollImage(QPixmap("caterpillar_small.gif"));
scrollImage->setWindowTitle("QScrollBar");
scrollImage->show();
return app.exec();
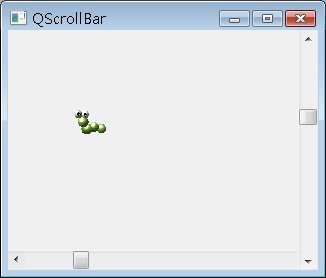
}下圖為執行時的參考畫面,拉動捲軸時,圖片會跟著移動: